Merchant guide
From installation to your first print file – step by step. You'll find every menu item in Shopify under Apps → Eazign.
1. Choose a plan
After installing, Eazign opens the “Plan & billing” page.
- Choose Starter, Pro or Business – monthly or yearly (2 months free).
- Every plan starts with 14 days free. You're billed through your Shopify invoice.
- “Usage” shows how much of your plan you've used. You can switch at any time; uninstalling ends the subscription automatically.
2. Create a blank
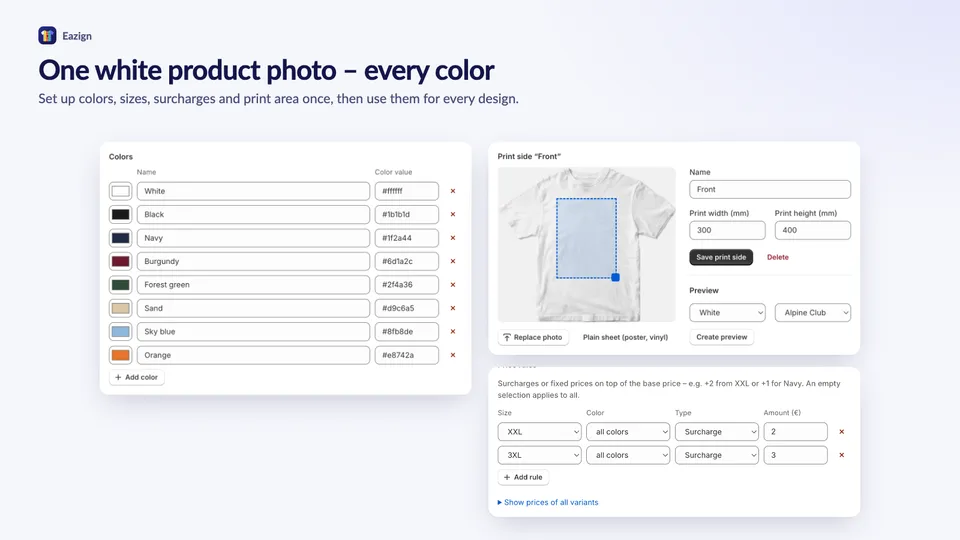
A blank is an unprinted product (e.g. your premium T-shirt) with its colors, sizes, prices and a white base photo. Everything else builds on it.
- Menu “Blanks” → pick a template: + T-shirt, Polo, Hoodie, Sweatshirt, Cap, Bag, Mug, Poster, Vinyl / sticker, Print (custom size) or No template. Print sides, sizes and print dimensions come pre-filled.
- Product data: name, product type, brand / model, print technique (DTF, sublimation, vinyl, screen printing, embroidery, laser), base price and optionally compare-at price and weight.
- Colors: enter a color name (e.g. Navy) and pick its value. Eazign recolors the white base photo into every color.
- Sizes & prices: sizes comma-separated (empty = one size). Under “Price rules” you add surcharges or fixed prices – e.g. +2 from XXL or +1 for Navy.
- Print sides (front, back, sleeve …): upload the base photo per side, move the blue frame onto the print area and enter print width and height in millimeters. Optionally a surcharge when customers design this side.
- Under “Texts & SKUs” you set product title, SKU and description of the generated products. Then “Save”.
Base photo: blank in white, photographed from the front, as a PNG with transparent background and at least 1500 px. Without a transparent background, the background is recolored too.
3. Create the designer product
The designer product is the “… – Your design” product your customers design themselves.
- In the blank, under “Designer product” on the right, choose a status (Draft or Active) and click “Create designer product”.
- Eazign creates the product in Shopify – with all colors, sizes, prices, mockups and print sides.
- If you change the blank later, click the button again: colors, prices, photos and print sides are applied again.
- All designer products are listed in the menu “Designer products”.
Tip: create it as a draft first, test it in your store, then set it to Active.
4. Add it to your store
The design button is added to your theme as an app block – no theme code changes.
- Shopify → Online Store → Themes → “Customize”.
- Open the “Products” template at the top and add the block “Eazign Designer” to the product section (ideally below the add-to-cart button). You can change button text and color in the block.
- On the left under “App embeds”, turn on “Eazign – Shop”. The cart then shows a preview of the customer's design.
- Save. The button only appears on designer products; all other products stay unchanged.
Tip: try it in a copy of your theme first (Themes → … → Duplicate) and publish it when everything looks right.
5. How customers design
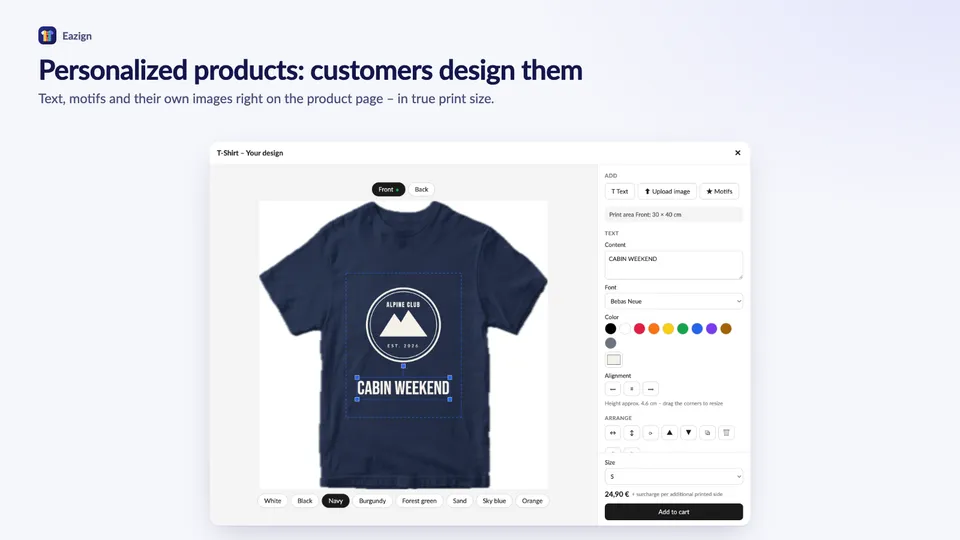
On the product page the customer clicks “Design it yourself”.
- Pick color and size, then place text (with fonts and colors), own images or your motifs on each print side.
- Designing happens in true print size. If an uploaded image is too small for the size, the designer shows a warning.
- “Add to cart” adds the product with its preview and any surcharges. Checkout runs through Shopify as usual.
6. Orders & print files
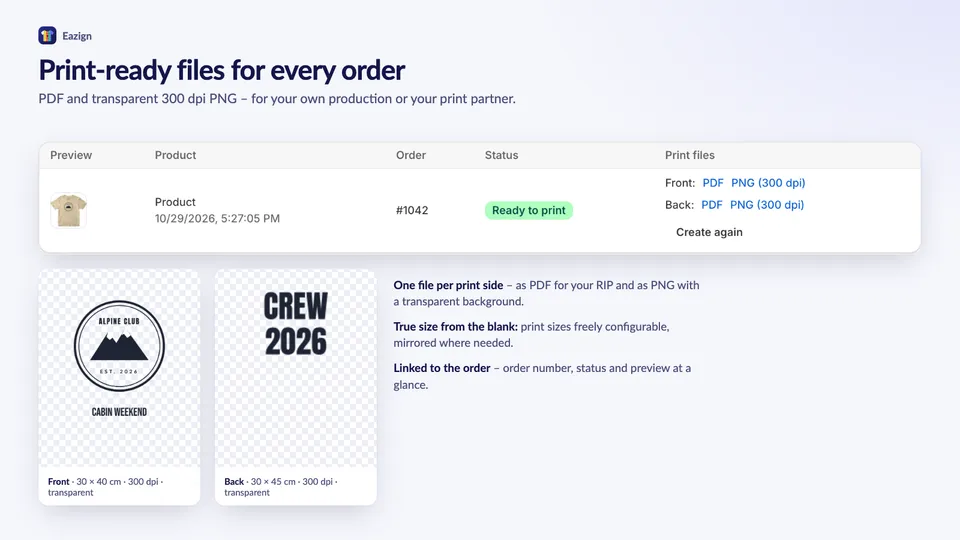
As soon as an order comes in, Eazign creates the print files automatically.
- Menu “Designs & print files”: every row shows design, order and status (Waiting, Creating, Ready to print, Printed).
- For each print side there is a PDF in original size and a transparent 300 dpi PNG – mirrored where the technique requires it (e.g. sublimation).
- “Create again” creates the files again, e.g. after changing the blank.
- Designs that haven't been ordered yet show “– (not ordered yet)”.
7. Upload motifs
Motifs are your own graphics – for the product generator and to choose from in the designer.
- Menu “Motifs” → optionally enter a category (e.g. hunting, carnival, sayings) → “Choose motifs”.
- PNG with transparent background or SVG, for large prints from about 3000 px wide. Several files at once work; the upload starts right away.
8. Product generator
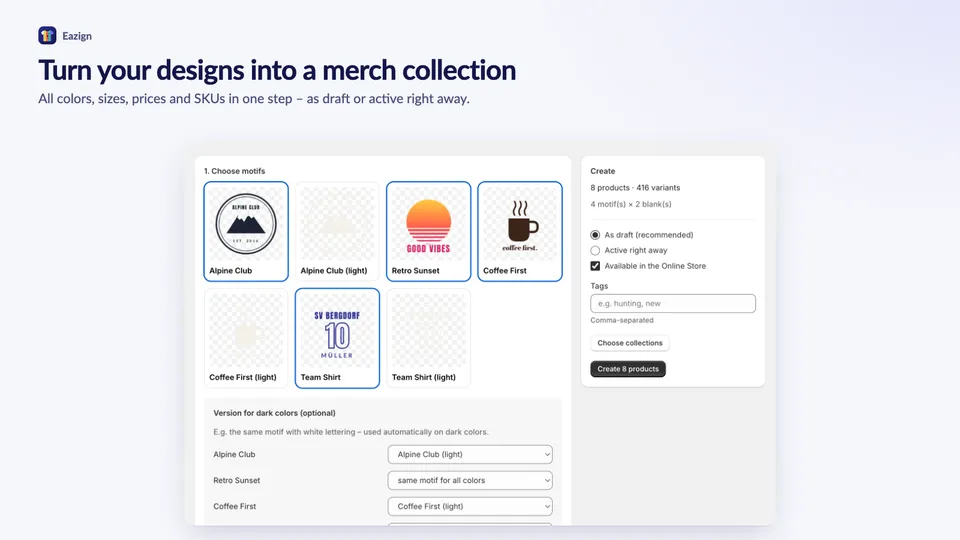
Motifs × blanks = finished products customers can buy right away – without designing anything themselves.
- Menu “Product generator” → 1. Choose motifs. Optionally add a version for dark colors per motif (e.g. with white lettering); it is used automatically on dark colors.
- 2. Blanks & colors: tick the blanks and choose the colors you want.
- 3. Placement: print side, alignment (centered, left, right = left chest), width and distance from top in cm. If a print area is smaller, the motif is scaled down automatically.
- Choose status (draft recommended), tags and collections, then click “Create products”.
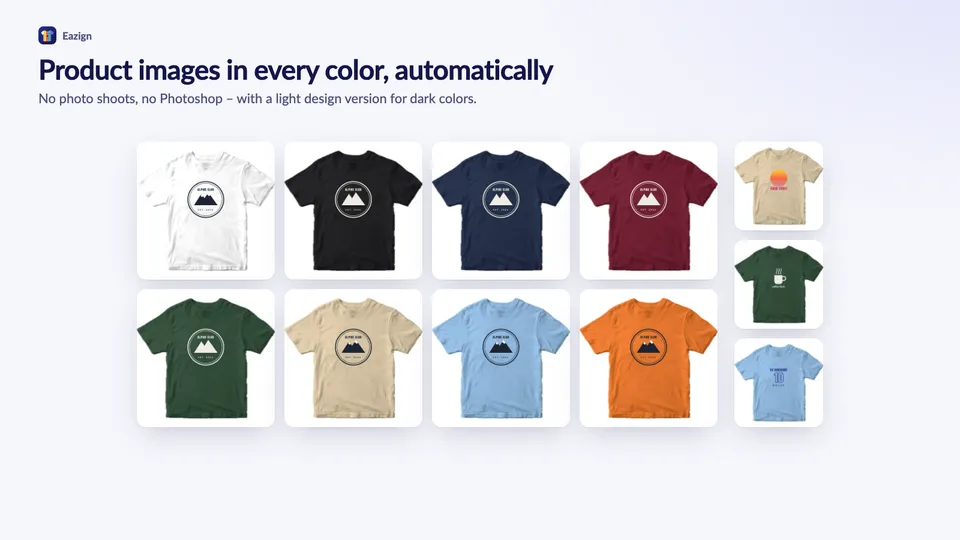
- “Recent runs” shows the progress. Every product gets all variants, prices, SKUs and mockups.
9. Scene images
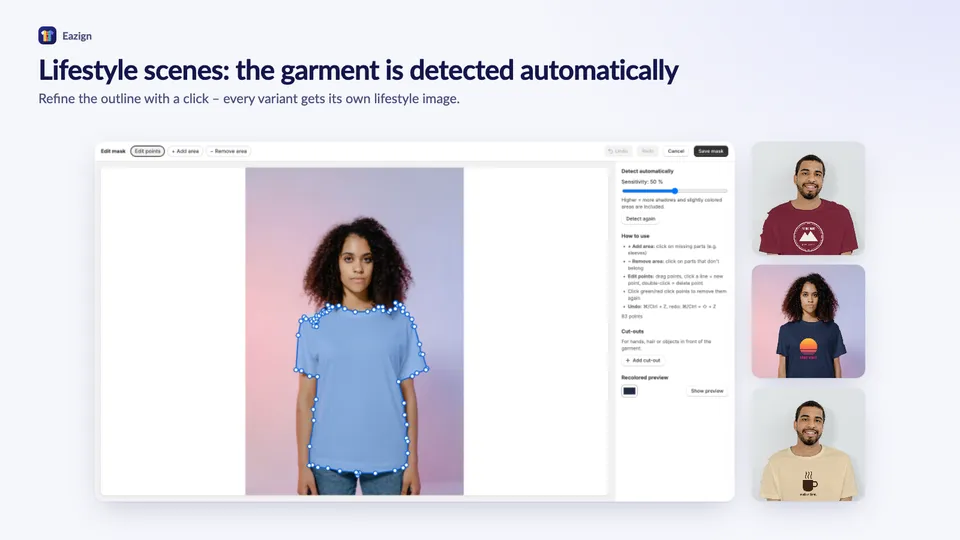
Scenes give every product its own cover image in collections – e.g. a person in a white shirt, a flat lay or a hanger. They are hidden automatically on the product page.
- Menu “Scene images” → choose “Matches product type” → “Choose scenes”. The garment should be white or light grey.
- Drag the 4 blue points onto the corners of the print area (1 top left, then clockwise), check with “Preview” and save.
- Optionally “Detect garment”: the garment is then recolored to the product color for every variant. “Edit mask” lets you correct the outline and add cut-outs for hands or hair.
- In the next generator run, matching products get the scene as their cover image.
10. Custom sizes, posters and mugs
For products where the area counts, not color and size.
- Vinyl / sticker and Print (custom size): customers enter width and height themselves. You set minimum and maximum sizes and a price per started 10 × 10 cm; the area price is added to the cart as a separate line.
- Posters: under “Print size per size” you set e.g. A4, A3 and A2. The customer designs once and the print file is scaled to the ordered format.
- Mugs and bottles: print side “Wrap-around” – the width is the circumference of the print area (e.g. 200 mm).
11. Existing Shopify products
You can also make an existing product designable instead of creating it from a blank.
- Menu “Designer products” → “Set up existing product” → choose the product.
- Choose the product option for the color and set name, type (flat or wrap-around) and print size in mm for each print side.
- Upload one mockup per color and move the blue frame to where the print goes. Optionally assign a surcharge variant (e.g. a hidden product “Back print”).
- Tick “Enable designing for this product” and save.
Any questions?
Write to us at info@eazign.at – we're happy to help you get set up.